Table of contents
Open Table of contents
Introduction
When working at D2iQ (formerly known as Mesosphere) a part of my job was to keep the development environment up-to-date and fast. A problem I encountered was that with an evolving application the dependencies of that application evolved and grew. This led to more and more configuration needed, bash script after bash script, Makefile after Makefile. In the end setting up your development environment was still only running one bash script. Knowing which environment variables have what effect was incredibly hard. Any of the shell scripts or make files could use any environment variable. A lot of detective work and bugs were being introduced because of this, you just cannot test every permutation.
This week I joined HashiCorp on the CDK for Terraform team. The CDK for Terraform allows you to write Terraform configuration in the programming language of your choice. This makes it accessible to the entire team, not just the few people familiar with bash, Terraform, aws cli, etc. During onboarding I reflected on the development setup challenges and I wanted to explore how the CDK can help. In the end I was surprised by some benefits I would not have anticipated, let me show you:

If you want to check out the CDK, here is a link to our GitHub repository.
Setting the stage
If you want to follow along you need to have a recent version of Node and Terraform installed. To install CDK for Terraform run npm install —global cdktf-cli. The cdktf command will be accessible to you.
- init: creates a CDK for Terraform project inside an empty directory
- get: downloads providers (you don’t need this if you use prebuilt ones from npm)
- deploy: creates the resources you specified in the main.ts file
- destroy: deletes the resources
To get started I can recommend the official tutorial and trying it yourself.
Creating Docker Container
This example assumes you got a frontend and backend application and both run inside a Docker container. Sometimes you want to test the built version, sometimes you want to work on your local files and see the results directly. As you can see in the code below we define an application function that allows you to define a type of application (in our case frontend and backend). This function returns another function that actually instantiates the application type. We use it to create one container of each type as you can see below.
import { Construct } from "constructs";
import { App, RemoteBackend, TerraformStack } from "cdktf";
import { Container, Image, DockerProvider } from "./.gen/providers/docker";
import { resolve } from "path";

function dockerizedApplication(
  name: string,
  dockerImageName: string,
  path: string
) {
  return function (
    scope: Construct,
    env: Record<string, string>,
    ports: Record<number, number>
  ) {
    const image = new Image(scope, `${name}-image`, {
      name: dockerImageName,
      buildAttribute: [
        { path: path, forceRemove: true, tag: dockerImageName.split(":") },
      ],
    });

    new Container(scope, `${name}-container`, {
      name,
      image: image.name,
      env: Object.entries(env).map(([k, v]) => `${k}=${v}`),
      ports: Object.entries(ports).map(([k, v]) => ({
        internal: parseInt(k, 10),
        external: v,
      })),
      ...(USE_LOCAL_APP
        ? {
            mounts: [
              {
                source: resolve(path, "src"),
                target: "/src",
                type: "bind",
              },
            ],
          }
        : {}),
    });
  };
}
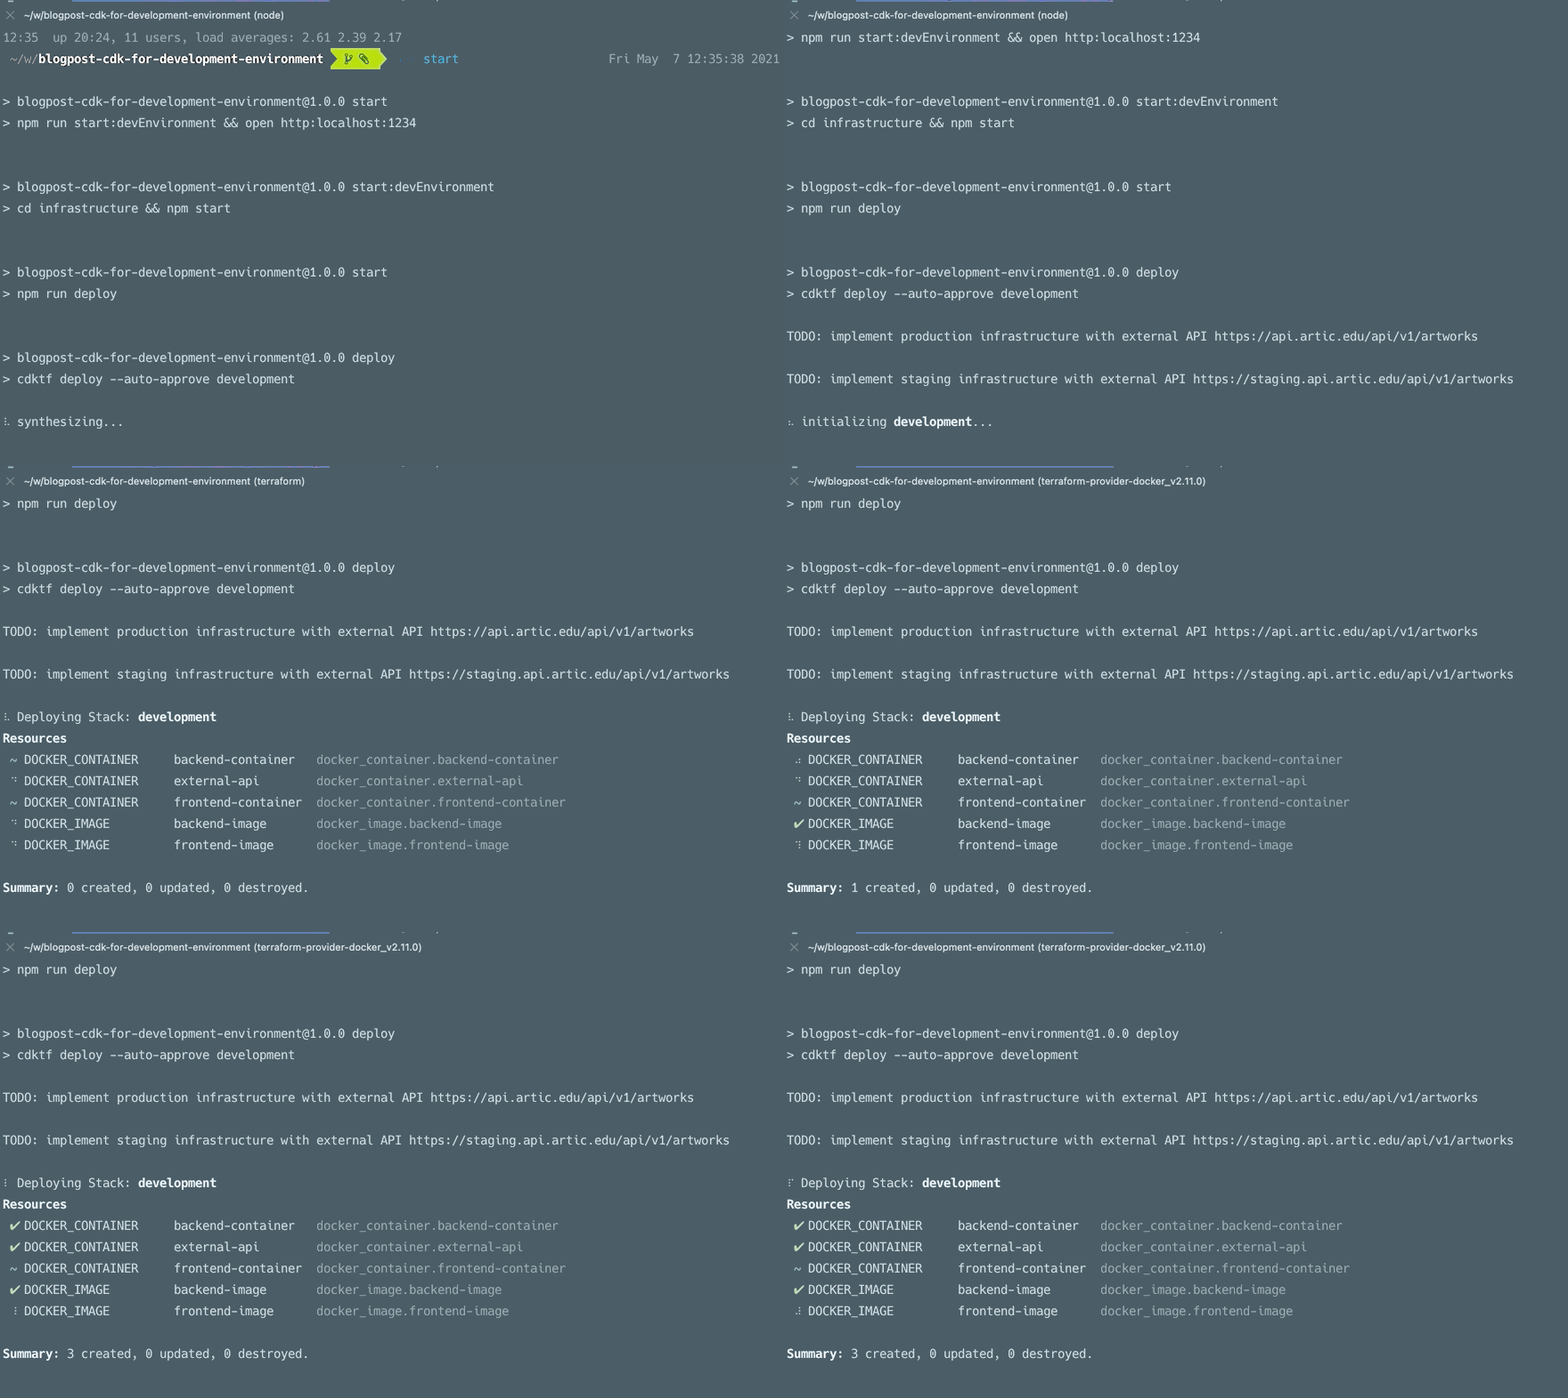
We define an image and a container for each application and pass down the environment variables and ports as arguments. If the USE_LOCAL_APP environment variable is set we set volume bindings that link the source directory. This is what you could see in the execution of this code in the gif above. We change the expected environment via environment variables and CDK for Terraform makes the smallest possible change to get to the desired state.
Handling external resources
In the real world your application may live in different environments, this means the same has to apply for development. If you work against an external API you might want to work with real data in some instances and with a mock version as a Docker image in others. In this part we have a function that returns the url to use in our backend, while having the side-effect of creating a container that hosts the app.
import { Container } from "./.gen/providers/docker";

function externalApi(scope: Construct, environment = ENVIRONMENT): string {
  switch (environment) {
    case "production":
      return "https://api.artic.edu/api/v1/artworks";
    case "legacy":
      return "https://api.artic.edu/api/legacy/artworks";
    case "staging":
      return "https://staging.api.artic.edu/api/v1/artworks";
    case "development":
      const port = 3001;

      new Container(scope, "external-api", {
        name: "external-api",
        image: "nginx:latest",
        ports: [{ external: port, internal: 80 }],
      });
      return "http://localhost:" + port;
    default:
      throw "Unknown environment, use production, legacy, staging, or development";
  }
}
Handling different authentication tokens per API is a challenge I did not tackle here. I’ll hint to a solution at the very bottom (by using Terraform Data Sources you can use your favorite secret store).
Keep it together
Remember this one configuration value that was renamed or changed its format? You most certainly change it for your dev environment, otherwise your application won’t work. But did you remember to add it into the right place for all environments? I personally did so many PRs adding one or two lines to our production or staging configs. I think if both configs would be in the same file or even the same function I would have done it right away, even more so if a type error hints to do so. This cuts a source of stress from the release process without extra effort. To be able to keep all your environments in one place the CDK for Terraform recently support for multiple stacks. Each stack represents an individually running system. Use stacks when you want things to co-exist; use environment variables when you want to change the state of your system dynamically. As you can see in the example we use the RemoteBackend, allowing you to store the state in Terraform Cloud instead of locally.
import { Construct } from "constructs";
import { App, RemoteBackend, TerraformStack } from "cdktf";
import { DockerProvider } from "./.gen/providers/docker";

class DevelopmentStack extends TerraformStack {
  constructor(scope: Construct, name: string) {
    super(scope, name);
    new DockerProvider(this, "provider", {});

    const externalApiUrl = externalApi(this);
    dockerizedBackendApp(
      this,
      { EXTERNAL_API_URL: externalApiUrl },
      { 3000: 3000 }
    );
    dockerizedFrontendApp(this, {}, { 80: 1234 });
  }
}

class ProductionStack extends TerraformStack {
  constructor(scope: Construct, name: string) {
    super(scope, name);

    const api = externalApi(this, "production");

    console.log(
      "TODO: implement production infrastructure with external API",
      api
    );
  }
}

class StagingStack extends TerraformStack {
  constructor(scope: Construct, name: string) {
    super(scope, name);

    const api = externalApi(this, "staging");

    console.log(
      "TODO: implement staging infrastructure with external API",
      api
    );
  }
}

const app = new App();
new DevelopmentStack(app, "development");

const production = new ProductionStack(app, "production");
new RemoteBackend(production, {
  hostname: "app.terraform.io",
  organization: "yourorg",
  workspaces: {
    name: "yourapp-production",
  },
});

const staging = new StagingStack(app, "staging");
new RemoteBackend(staging, {
  hostname: "app.terraform.io",
  organization: "yourorg",
  workspaces: {
    name: "yourapp-staging",
  },
});

app.synth();
To work with a stack you have to specify its name as a positional argument, e.g. cdktf deploy production or cdktf destroy staging.
Conclusion
Thanks a ton for reading up into here, here is a link to the repo as a reward. The benefits I see from taking this approach are:
- Most developers can read and write Typescript (or at least more than Bash, Makefiles, or Bazel). This means everyone is able to contribute to your teams development environment and everyone can play around with it easily.
- Parallelism and caching is hard to do in bash, conditional and computational logic is hard to do in Makefiles, Terraform can do both pretty well. By using the CDK for Terraform you can leverage that in a familiar language.
- It’s easier to work exploratory as iterations are faster and the documentation for the technology you use is right inside your editor (assuming you have a TS language server installed)
- The CDK for Terraform does not support async code currently, this means if you need an extra step to fetch external data and store it in a file to use in the CDK. If you heavily rely on loading configuration for your development setup from an internal API (that has no Terraform Provider) you should pick another tool
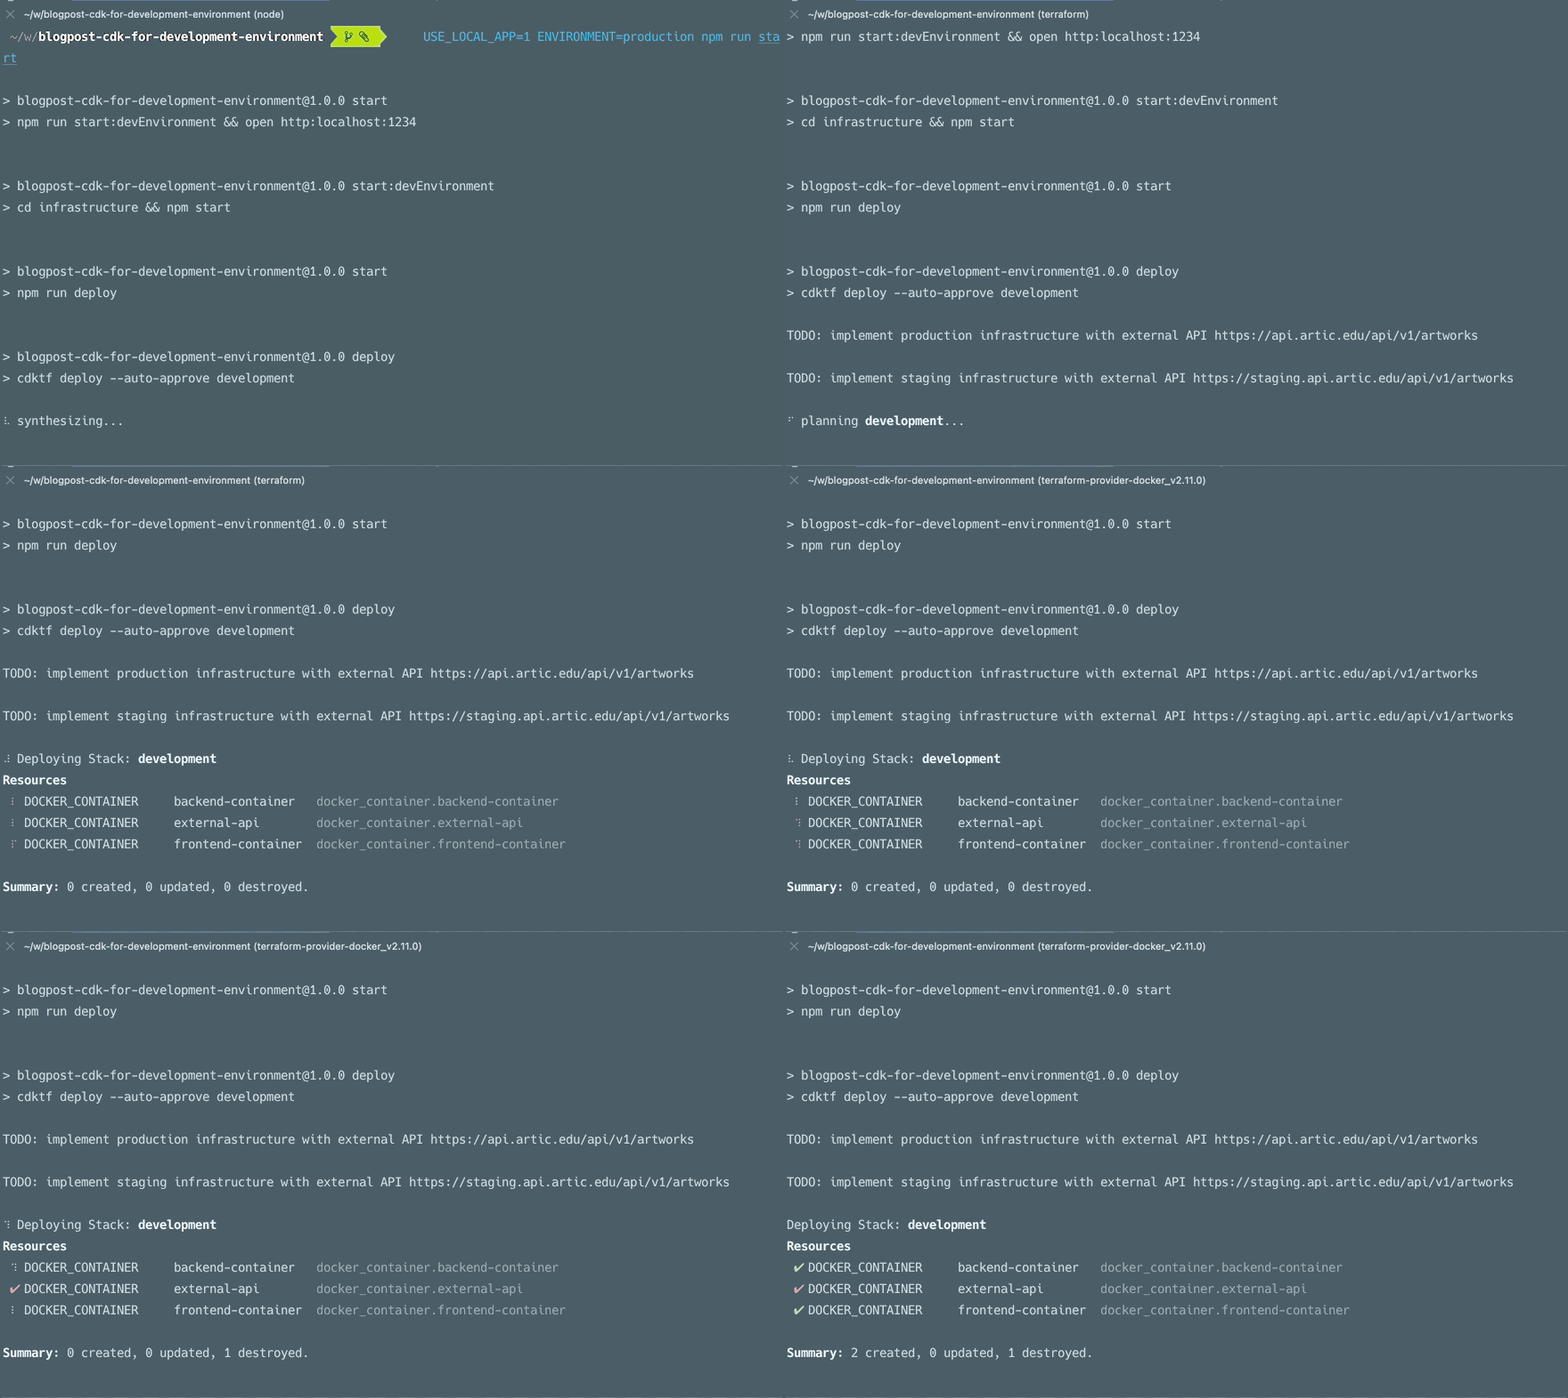
This gif below going from the default to a production config with local build.

All of the above points can also be made for Python, C#, Java, and soon Go, the only reason I used TS here is that I’m most familiar with it currently. If you want the next blog post to be in the language of your choice please leave a comment, bonus points for including a topic you’d like me to cover. To conclude, let’s go over other possibilities you have with the CDK for Terraform.
The sky is the limit
Everything can be part of your development environment
Let’s say your app uses a cloud service for transcribing speech to text or a managed database. Getting things like this set up for development is super hard, sharing it across your team can be annoying. When you use one stack to create it and a Data Source on the development stack to find the id / credentials it all becomes easier.
Configuration is key
A good chunk of the scripts I wrote were bash heredocs to write out configuration files for either of the applications. If your application uses Typescript you can import the types for your config into your CDK for Terraform configuration and let the CDK write the config with a simple JSON.stringify. Now you have a strong type contract when bootstrapping your application, helping you to find nasty typos early on.
Getting rid of secrets
Having to find this one password you need every once in a blue moon can be really tedious. It can go from looking through 1Password to finding out the person who quit half a year ago had it on a post it real quick. With CDK for Terraform you could use the 1Password provider (or HashiCorp Vault, or whatever secret management system you want to use) and take the secret right from where it’s defined (and updated).
Being close to production
You want to stay close to production with your development setup. This helps you to avoid bugs that would normally only come up when you consider your work done. By keeping your production and development infrastructure side by side it becomes more obvious if the environments drift apart. Programming language paradigms ease switching back and forth between a High Availability setup (e.g. 5 containers running your app and a load balancer handling requests from the frontend) and a normal (e.g. 1 container running your app, no load balancer needed) one or different versions of APIs your app depends on, making it a great tool for testing your software.